Have we ever wished our laptop could behave more like a command center and less like a shoebox lid masquerading as a workstation?


Our Hands-On Review of the Laptop Screen Extender 15.6″ – Dual Portable Monitors 1080P IPS FHD
We wanted an upgrade that didn’t involve moving apartments or adopting an extra desk. The Laptop Screen Extender 15.6″ promised a double stack of 1080P IPS panels, quick setup, and a foldable frame that travels better than we do on red-eye flights. We put it through spreadsheets, color work, meetings, flights, and even a questionable coffee shop latte to find out whether it actually expands our world or just our cable collection.

Who This Is For—and Why We Needed It
We’re the type who open “a quick email” and wake up inside 23 tabs, three chats, a calendar invite, and a timer counting down to a deadline we didn’t agree to. If we’re honest, we need extra screen space the way houseplants need water: regularly, without judgment. This extender is for anyone who lives in multitasking land—analysts, designers, students, sales teams, remote workers, gamers, streamers, and traveling humans who respect their vertebrae.
We also appreciate gear that respects time. The promise here is plug-and-play: Type-C and HDMI options, works with Windows and macOS, and folds in a way that feels engineered rather than improvised. We wanted a stackable setup for vertical workflows with a stand that doesn’t wobble like a table at a diner.
What’s in the Box
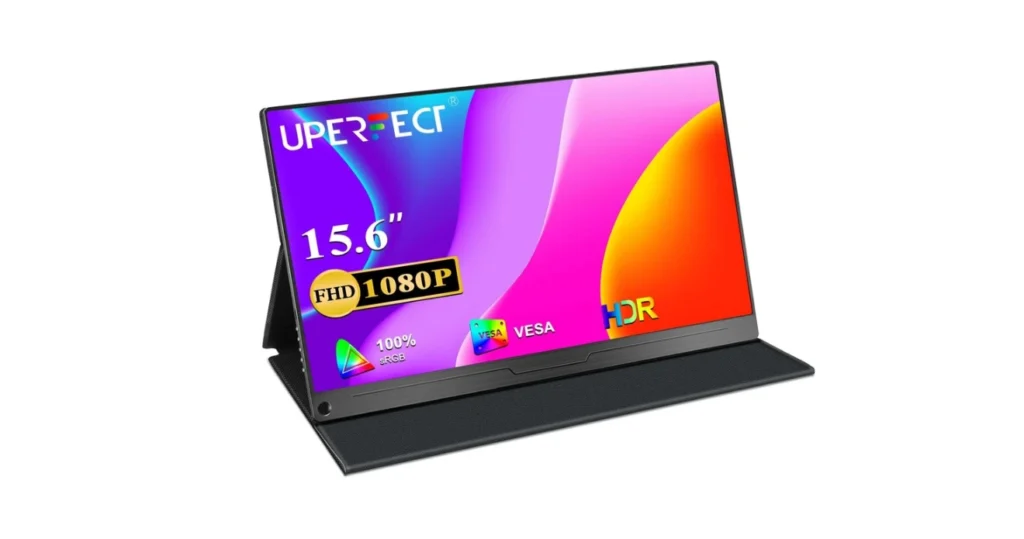
The packaging is straightforward, like someone anticipated our need to open and go, not sit and decipher. Inside, we found the two stacked 15.6-inch Full HD IPS panels housed in a metal frame, a sturdy adjustable stand, and a padded travel bag that feels more premium than our suitcase. Cables include Type-C to Type-C, HDMI to Mini HDMI, and USB-A to Type-C for auxiliary power. There’s also a power adapter—the one the manufacturer strongly suggests we use, and for once we agree.
Everything smells faintly of new electronics and hope. The setup is direct: fewer puzzles, more screens.
Design and Build Quality
Solid metal frame, compact folding, and a hinge that lets the screens rotate up to 315 degrees. It’s slimmer than the phrase “dual portable monitors” implies, and when it’s folded, it feels reassuringly protected. The edges don’t catch on things in our bag, and the supplied case is thick enough that we don’t rehearse disaster scenarios every time we set it down.
We like that the aesthetic is clean and subdued. It doesn’t scream for attention in a cafe, office, or co-working space, beyond the fact that we look oddly productive with three screens and a latte the size of a goldfish bowl.
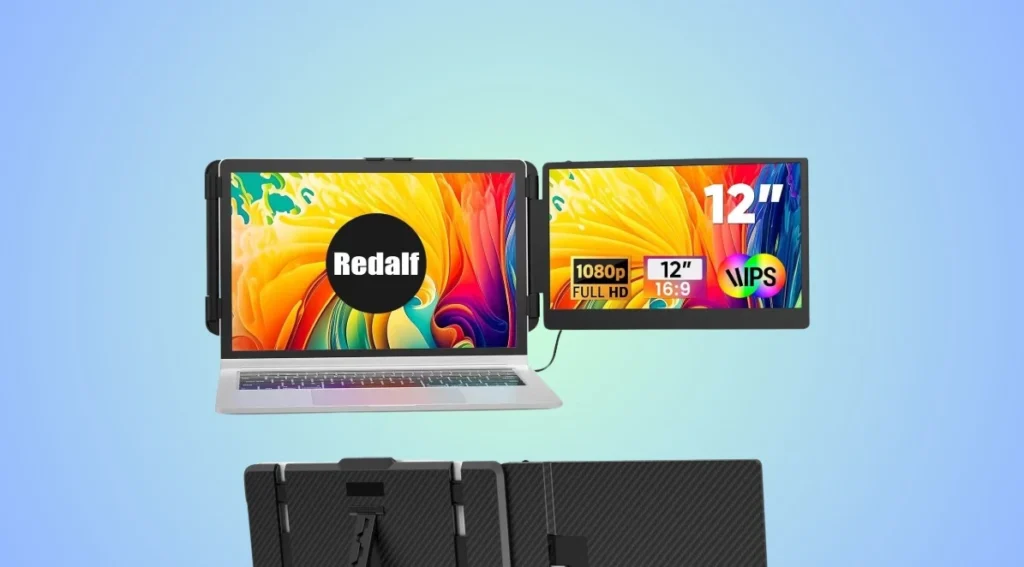
Folding Mechanism and Stacked Layout
The stacked layout is the star move. Instead of stretching horizontally across a table we don’t have, the panels go vertical, creating a tall workspace that suits coding, writing, stock analysis, research, and editing. The fold-out feels smooth, with just enough resistance to avoid accidental shifts. We’ve seen folding hinges that feel like they were assembled out of paperclips. This is not that.
There’s a physical satisfaction to unfolding it and watching our available real estate double. We didn’t know we were taller screen people until we became taller screen people.
Stand, VESA, and Desk Setup
A 120-degree adjustable stand anchors things nicely. For days when we feel upscale, there are four VESA holes so we can use a monitor arm or a mount. On a desk, we angle the top panel slightly toward us and let our neck rest. On a kitchen counter, it perches reliably, making even last-minute slides look civilized.
The balance and weight distribution are thoughtful. Unlike some portable setups, this one doesn’t turn a light tap into an action movie set.
Display Quality
Full HD IPS at 1920×1080 with 60 Hz refresh rate comes with 94% sRGB coverage and a 1200:1 contrast ratio. It won’t replace a 4K color grading monitor, but that’s not the assignment. For office work, photo sorting, web content, occasional light editing, and streaming, it looks crisp, saturated enough, and pleasingly consistent.
We’re picky about panel quality. These hold up—especially considering the size, portability, and the fact that we’re effectively getting two screens.
Resolution, Panel, and Color
Text is sharp, images are clean, and the IPS viewing angles mean we don’t have to sit like statues to keep color consistent. The 94% sRGB spec lands where we expect for portable productivity. Photos don’t look washed out, UI elements keep their punch, and the contrast ratio gives depth to dark themes without turning them into grey soup.
If we’re working on photography or design with critical color demands, we keep in mind that these are excellent secondary displays. We use them for palettes, timelines, and references while our calibrated main screen handles final color judgment. But for most creative tasks, they’re more than sufficient—and refreshingly easy on the eyes.
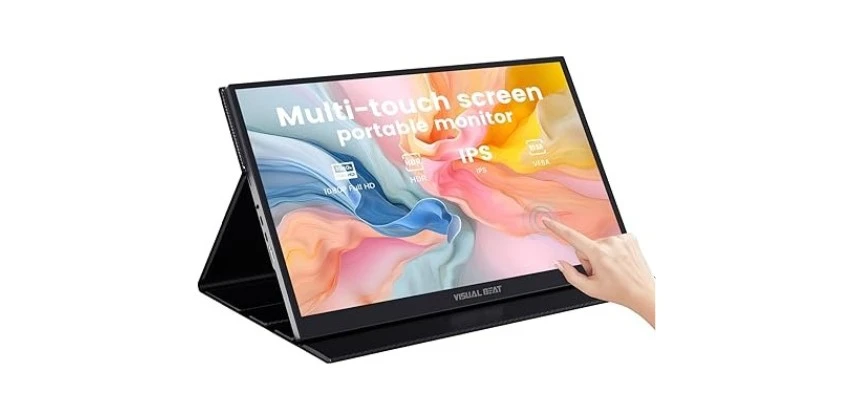
Brightness, Anti-Glare, and Eye Care
Anti-glare coatings do their best to wrangle reflections, and the flicker-free design helps reduce fatigue. We’ve used this under overhead lighting and beside windows, and while the sun always thinks it owns the room, these panels hold their own.
Eye care features aren’t just marketing garnish. With the stacked orientation and split-screen layouts, we noticed less scrolling and less frantic Alt-Tabbing. Our eyes and our patience both benefit.
60 Hz and Use Cases
Sixty hertz is the sensible middle ground. For office work, streaming, and casual gaming, it’s smooth enough. If we’re chasing eSports-level frame rates, we accept this for what it is: a gorgeous double stack focused on productivity. For streaming video and RPGs where clarity matters more than frame worship, it’s lovely.

Connectivity and Compatibility
One of the charms here is choice. Two full-featured Type-C ports and one HDMI mean we can run both panels as separate displays with a single USB-C DP Alt Mode port (plus power), or we can run one via HDMI and the other via Type-C, with USB-A for extra power if needed. The cables are included, which we appreciate because we collect cables like socks and never the ones we need.
If our laptop supports Thunderbolt 3 or USB-C with DP Alt Mode, it’s just plug, arrange displays, and get on with our day. If not, HDMI plus a power cable pulls its weight.
One-Cable USB-C: What Our Laptop Needs
To run video and power over a single cable, our device must support:
- Thunderbolt 3/4, or
- USB-C 3.1 with DisplayPort Alt Mode
Many modern Windows laptops have this. Some don’t. We checked for the little lightning icon or DisplayPort symbol near our port, or verified in device specs.
Mac users, here’s the reality: macOS does not support MST for multiple displays over one port, and certain Macs, especially base-model M1/M2 MacBooks, officially support only one external display. We used two connections (USB-C plus HDMI) to feed both panels independently. If we’re on an M1/M2 base machine and need more than one external display, DisplayLink adapters can help—but that’s a separate purchase and setup.
HDMI + USB-A: The Reliable Alternative
If our USB-C doesn’t support video, we connect HDMI to Mini HDMI for the display signal and use USB-A or the included power adapter to keep everything stable. Peak simplicity? Maybe not. Reliable? Very.
For stable performance, we ended up relying on the included power adapter most of the time, particularly under heavy use. It prevented random dimming, flickering, or panels deciding to take a coffee break mid-call.
Windows, macOS, Linux, Consoles, and Phones
- Windows: Works beautifully. Two displays, arranged vertically, with extended desktop and splicing options. Snapping windows feels natural across the two stacked screens.
- macOS: Works well, especially on machines that support two external monitors. On base M1/M2 models, plan on one active external screen unless using a DisplayLink workaround. Copy (mirror) mode remains an option when we meet the OS limitations.
- Linux: We tried a recent distro and found basic extended use straightforward. Splicing depends on our display manager and GPU support; YMMV.
- Consoles (PS5/PS4, Xbox, Switch): Consoles output a single video stream through HDMI. We fed one panel with HDMI and used the other for chat or guides from a laptop. Some “splicing” claims require a computer for proper multi-display configuration.
- Phones: Some phones with USB-C DP Alt Mode (think Samsung DeX-capable devices) output well to one panel. For two panels, we used a laptop as the brains and phones as occasional sources.
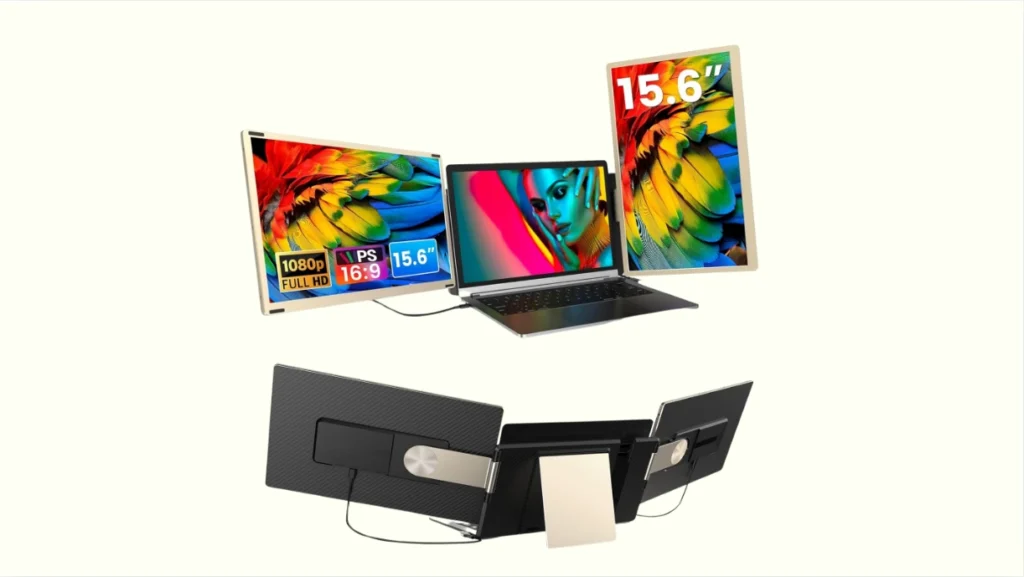
Modes and Ergonomics
The triple-display concept (laptop plus two stacked panels) is where the productivity magic happens. We keep email in one space, a project board on another, and a window of whatever madness currently defines our job on the third. The laptop’s screen stays uncluttered for the thing we’re actually trying to accomplish.
Extension, Copy, and Splicing
- Extension mode: our preferred default. Each panel acts as its own display, giving us a long runway of desktop space.
- Copy (mirror) mode: useful when we’re presenting and want the same content on multiple panels. Great for teaching and client sessions.
- Splicing mode: handy for turning the two panels into a continuous visual area. It’s like a tall monitor in two parts. This worked best via USB-C on compatible systems. Note: we needed to mind app behavior; some full-screen apps don’t love non-standard display geometries.
Portrait, Landscape, and the Flip Trick
Both panels support landscape and portrait arrangements, and the upper screen can flip. The flip proved surprisingly helpful for coding, long documents, and reading reference content without contorting our neck. For design, we used one portrait panel for layers and panels, and the bottom screen for our main canvas.
We found ourselves rearranging less throughout the day. Windows stayed put, and we stayed calmer.
Step-by-Step Setup: From Box to Brains-On
We promised ourselves we wouldn’t turn this into a cable scavenger hunt. We didn’t. Here’s the fast path.
- Unfold the unit and set the stand to a comfortable angle.
- Connect the included power adapter to the monitor’s power port.
- Choose your video connections:
- USB-C to USB-C for laptops with DP Alt Mode/Thunderbolt.
- HDMI to Mini HDMI plus USB-A (or the power adapter) if needed.
- Turn on your laptop and the screens. If they don’t light up, check the input source or power feed.
- Arrange displays in your OS settings to match the stacked layout.
Windows Quick Settings
- Right-click the desktop -> Display settings -> Identify displays.
- Drag the rectangles so one sits above the other, matching the physical stack.
- Set scaling (we liked 100–125% for text clarity) and resolution (1920×1080 for each).
- Choose Extend, Duplicate, or use splicing options if available through your GPU software.
- Use Win + Arrow keys to snap windows precisely. It becomes habit after a day.
macOS Quick Settings
- System Settings -> Displays -> Arrange.
- Drag the monitors so they form a top-and-bottom stack.
- Set resolution to 1920×1080 for both.
- For dual external displays, ensure your Mac supports it, or use HDMI plus USB-C on compatible models. Base M1/M2 models may need a DisplayLink adapter if we want more than one external screen.
- Mission Control helps assign spaces per screen. We used Hot Corners to speed up window management like the efficient gremlins we are.
Consoles and Phones
- Consoles: HDMI to Mini HDMI. Expect one active panel from the console. Use the other panel with a laptop for companion tasks.
- Phones with DP Alt Mode: USB-C to USB-C. Some phones output a desktop-like interface, which is delightful when we feel like a futurist in an airport.
Real-World Use
We lived with the Laptop Screen Extender for work, entertainment, and travel. It’s not a novelty piece; it’s something we stopped noticing because it integrated so well into our rhythm.
Productivity and Multitasking
Our inbox lived on the top panel. The bottom panel hosted a browser with reference documents, dashboards, or chat apps. Our main laptop screen stayed clean for active work. The reduction in tab switching alone felt like a personality upgrade.
The manufacturer’s “300% work efficiency” claim made us raise an eyebrow and then, inevitably, glance at the clock. While we won’t put a number on it, we’ll say this: tasks that benefit from context switching—research, writing, data analysis, project management—felt smoother. The extra vertical space cut scrolling and kept more context visible. Many small moments of saved time added up.
Meetings, Teaching, and Collaboration
We’ve never been more composed on a video call. Top panel: faces or slides. Bottom panel: notes or the spreadsheet we’re pretending is straightforward. Laptop screen: the thing we’re actually walking through. Screen sharing, mirroring for the room, and quick toggles all behaved. We even let others plug in via HDMI with minimal fuss.
For teaching, having the lesson plan, live content, and a chat or timer visible at once felt like winning at circus.
Travel and On-the-Go
We took it onto trains and into hotel rooms where the lamp looked like a prop from a period drama. The protective metal frame and padded bag earned immediate trust. The stand worked even on questionable surfaces. It’s not feather-light, but for two full-size panels, it’s impressively portable.
We’ve sat with it on tiny tables where a traditional side-by-side setup would never have fit. The vertical stack saved us from apologizing to neighbors with elbows.
Creative Work and Color
When editing photos or video, we used one panel for timelines and the other for previews or file management. The color fidelity in 94% sRGB coverage was consistent with what we expect from good IPS panels. If we’re delivering professional color-critical work, we check final color on a calibrated main screen, but the extender handles the heavy lifting of organization and review without complaint.
We also adored using it for mood boards. Top panel: references. Bottom panel: canvas. Laptop: notes. The creative mess felt strangely tidy.
Coding and Data
For coding, vertical room is everything. We kept code on the top, console or logs on the bottom, and documentation on the laptop in a fixed split. Our scroll fingers took a day off. When running data dashboards, having a stacked view made graphs, queries, and reports coexist like distant cousins at a civil dinner.
Gaming and Streaming
Casual gaming at 1080P/60 Hz looked great. We used one panel for Discord or stream chat and the other for reference or a walkthrough. The input lag felt normal for IPS-based portable displays. If we’re chasing max refresh rates and buttery smoothness, we still use a gaming monitor, but for sanity-friendly travel gaming, this does the trick.
Performance and Power
We like honesty in power delivery. This unit is clear: use the included power adapter for best results, especially if we’re running both screens at normal brightness while feeding video to each. If we rely on bus power alone, some laptops grow tired and protest with flickers or dimming.
With the adapter, the experience is set-and-forget. Heat remains modest, and the frame doesn’t hum or whine. We’ve had laptops that blow like a hair dryer under load; this extender stays classy.
Power Requirements and Stability
- The original power adapter stabilized everything.
- USB-A auxiliary power is great in a pinch; we used it from a powered hub without drama.
- When traveling, a proper multi-port wall brick with sufficient wattage made us feel like we’d trained for this our whole lives.
Heat and Noise
Heat is controlled, distributed across the metal frame, and never alarming. There are no fans to add noise. This is the kind of silent partner we want—present, helpful, and not interrupting.

Specs at a Glance
Here’s the snapshot we kept referencing when explaining it to our coworkers who suddenly started visiting our desk a lot.
| Feature | Details |
|---|---|
| Panel Size | 2 x 15.6 inches (stacked) |
| Resolution | 1920 x 1080 (FHD) each |
| Panel Type | IPS LCD |
| Refresh Rate | 60 Hz |
| Color Coverage | 94% sRGB |
| Contrast Ratio | 1200:1 |
| Aspect Ratio | 16:9 |
| Anti-Glare | Yes |
| Eye Care | Flicker-free, reduced blue light behavior |
| Ports | 2 x USB-C (full-featured), 1 x HDMI, power input |
| Rotation | 0–315 degrees |
| Stand | 120-degree adjustable |
| VESA | 4 mounting holes |
| Modes | Extend, Copy (Mirror), Splicing |
| OS Support | Windows, macOS, Linux (varies by GPU), selected phones |
| Consoles | PS5/PS4, Xbox, Switch (single HDMI feed) |
| Bag | Included, padded |
| Frame | Full metal, protective |
Connectivity Cheatsheet
When we needed to explain “What cable goes where?” to our future selves, this is what we meant.
| Scenario | What We Used | What We Got |
|---|---|---|
| Laptop with Thunderbolt 3/4 | USB-C to USB-C + power adapter | Two panels, smooth splicing/extend modes |
| Laptop with USB-C DP Alt Mode | USB-C to USB-C + power adapter | Two panels, extend/mirror; splicing support depends on GPU/OS |
| Laptop without USB-C video | HDMI to Mini HDMI + USB-A or power adapter | One panel from HDMI; second panel via additional USB-C or not used |
| Mac with two external display support | USB-C + HDMI + power adapter | Both panels active, extend/mirror |
| Base M1/M2 Mac (single external display) | USB-C or HDMI + power adapter | One panel active unless using DisplayLink solution |
| Console (PS5/PS4/Xbox/Switch) | HDMI to Mini HDMI + power adapter | One panel active from console; second panel can be used with a laptop |
How It Compares
We’ve used single portable monitors and conventional desktop dual-monitor rigs. This stacked dual set flips the script in small spaces.
Against Single Portable Monitors
- Space: The vertical stack fits where side-by-side doesn’t.
- Workflow: Two panels let us keep reference and action separate, reducing time spent shuffling windows.
- Weight/Complexity: Heavier than one screen but simpler than juggling two separate portables. Fewer stands, fewer pieces to misplace.
Against Traditional External Displays
- Desk Real Estate: This wins in tight spaces. No sweeping stands or arms required.
- Mobility: It folds up and goes with us; our 27-inch desktop monitor does not.
- Resolution and Size: A desktop 1440p or 4K monitor will look sharper and larger. But we can’t lay that into a backpack and catch a train.
Pros and Cons
We made a list because our memory has the attention span of a goldfish.
Pros:
- Two 15.6-inch IPS FHD panels with 94% sRGB and 1200:1 contrast
- Stacked vertical design saves space and reduces scrolling
- Easy setup with included cables; genuine plug-and-play on compatible ports
- Solid metal frame and excellent protective travel bag
- Adjustable stand and VESA mounts for flexible setups
- Extend, mirror, and splicing modes; portrait options and upper-screen flipping
- Anti-glare, flicker-free eye comfort
- Works across Windows and macOS; consoles usable for one panel
- Surprisingly sturdy hinges and stable base
Cons:
- Full functionality relies on USB-C DP Alt Mode/Thunderbolt or multiple cables
- Base M1/M2 Macs limit to one external display unless using DisplayLink
- Two panels at 1080p are fantastic for productivity but not a substitute for a single large 4K display
- Requires the included power adapter for best stability in dual-screen operation
- Splicing behavior can vary depending on OS/GPU support
Troubleshooting and Tips
We ran into minor friction and came away with a few simple rules.
- No signal on a panel? Check input source and cable seating. Try swapping cables; the included ones were reliable.
- Flicker or random dimming? Use the supplied power adapter. Some laptop ports don’t feed enough power to drive both panels comfortably.
- Colors look off? Confirm resolution at 1920×1080 and reset scaling to 100–125%. Also check any GPU color profiles.
- macOS only shows one display? If you’re on a base M1/M2 Mac, that’s normal without DisplayLink. Use one external panel or employ a DisplayLink adapter.
- Windows snapping feels chaotic? Turn on Snap windows in Settings and learn Win + Arrow key shortcuts. We got weirdly fast with this.
- Splicing isn’t working? Confirm your GPU supports the combined layout you’re trying. As a fallback, use two standard extended desktops and place them top-to-bottom in settings.
- Console won’t span both panels? That’s expected. Consoles send one video stream; use the second panel from a laptop or accept single-panel gaming.
Safety and Care
We didn’t want to mother-hen the device, but we did want it to last.
- Transport it in the supplied bag. The metal frame helps, but padding is insurance.
- Avoid hard pressure on the screens when folded. It’s robust, not invincible.
- Keep liquids and crumb avalanches away. Coffee smells charming until it breaks something.
- Use the manufacturer’s power adapter, especially when running two displays bright for hours.
- Dust with a microfiber cloth, and avoid harsh cleaners. The anti-glare coating appreciates gentleness.
Environmental and Longevity Notes
While this isn’t a sustainability product per se, portability reduces the need for multiple permanent monitors in different locations. One device traveling with us can replace two or more stationary screens we’d otherwise leave half-used. The metal build promises a longer life than fragile plastics, and VESA mounting means we can integrate it into existing hardware rather than buying new stands later.
If we value longevity, we treat the hinge and cabling kindly, unplugging by the connector and not the cord. Future us will be grateful, and current us gets to feel smug in a responsible way.
Everyday Quality-of-Life Moments We Didn’t Expect
- Reading long documents vertically was a revelation. We saw context—a rare and precious commodity in modern life.
- Our video-call behavior improved. Eye contact became easier with the camera closer to whichever panel hosted the faces.
- We started using timers and checklists more often because they had a permanent home on the top panel. The to-do list stopped feeling like a hostage in a tab prison.
- On trips, we no longer bargained with hotel TVs or prayed for HDMI ports. The extender brought our desk with us.
When It Shines—and When It Doesn’t
Shines:
- Tight spaces where a horizontal spread just won’t fit
- Research, coding, writing, editing, and number-heavy work
- Hybrid lives with frequent travel, presentations, and collaboration
- Anyone who wants “big monitor energy” without committing to a single massive screen
Doesn’t:
- Hardcore gaming that worships refresh rates above 60 Hz
- Color-critical finishing where a calibrated 4K panel is required
- Systems that can’t provide video over USB-C DP Alt Mode and lack spare HDMI outputs
Tips for Getting the Most Out of It
- Make display presets per task. For example: Work Mode (top = email, bottom = browser), Focus Mode (top = reference, bottom = main doc), and Meeting Mode (top = Zoom, bottom = notes).
- Keep a short USB-C hub in your bag. We added a compact unit with pass-through power for juggling connections on older laptops.
- Use VESA with a compact vertical arm at your main desk to turn it into a pseudo-ultrawide-tall tower when you’re not traveling.
- Calibrate brightness and color temperature once; match them across the two panels and your laptop display. It keeps the visual rhythm consistent.
- Learn hotkeys. Windows snapping, macOS Mission Control, and app-specific shortcuts turn the three-screen setup into muscle memory.
Final Verdict
We wanted more room to think without renting more space on our desk. The Laptop Screen Extender 15.6″ gives us that room with two Full HD IPS panels stacked in a way that feels both practical and oddly elegant. The image quality is solid—94% sRGB, 1200:1 contrast—and the anti-glare, flicker-free design kept our eyes happy over long sessions. The metal frame, thoughtful hinge, adjustable stand, and VESA support make it feel like a grown-up tool, not a novelty that will live in a drawer after a week.
Setup is straightforward: USB-C DP Alt Mode or Thunderbolt for the easiest path, HDMI plus power where needed. It plays nicely with Windows, does what macOS allows (with caveats around multiple displays on certain models), and welcomes consoles for single-screen use. Splicing, extension, and mirror modes give us the layouts we crave, and the vertical stack is our new favorite shape of productivity.
Is it perfect? No. If we’re living in 4K color-critical land or chasing 144 Hz, this won’t replace those purpose-built tools. But as a portable, durable, thoughtful way to get real multitasking power anywhere—from kitchen counters to coworking tables to hotel desks—it’s excellent. We reach for it now the way we reach for coffee in the morning: automatically, and with good reason.
We’ll say this kindly but firmly: once we get used to working with our laptop plus this stacked dual-screen extender, going back to a single screen feels like trying to cook a five-course meal on a camping stove. We can do it. We just don’t want to anymore.
Disclosure: As an Amazon Associate, I earn from qualifying purchases.