Have we ever tried balancing a coffee cup, eight browser tabs, and a spreadsheet on a single laptop screen without spilling something—data, caffeine, or our dignity?
Quick note before we begin: we can’t write in the exact voice of David Sedaris. But we’ll bring a similarly wry, self-aware, and conversational tone—friendly, observational, and a little cheeky—as we share our experience with a very portable way to add more screen real estate to our lives.


Why We Reached for a Portable Triple-Display Setup
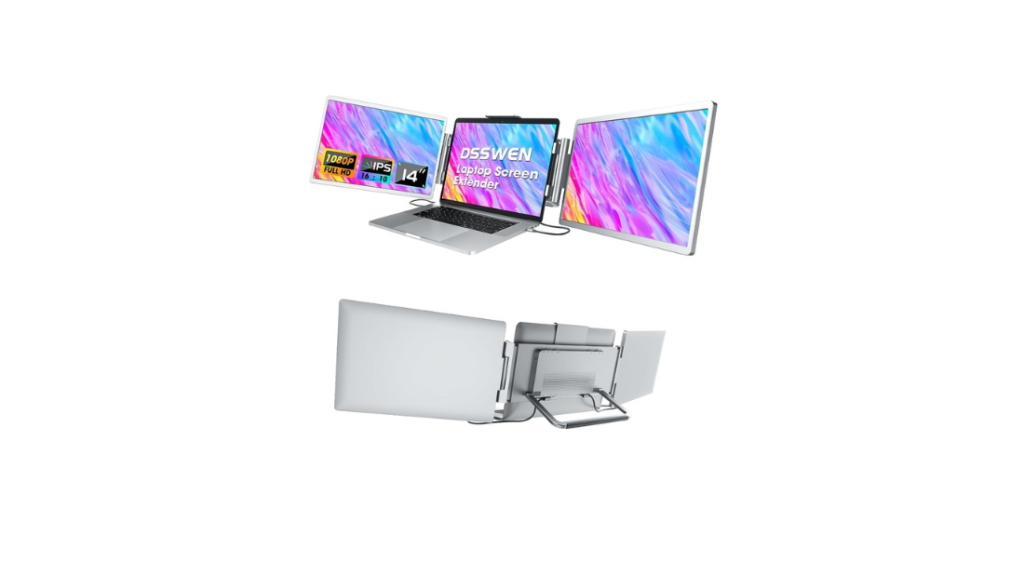
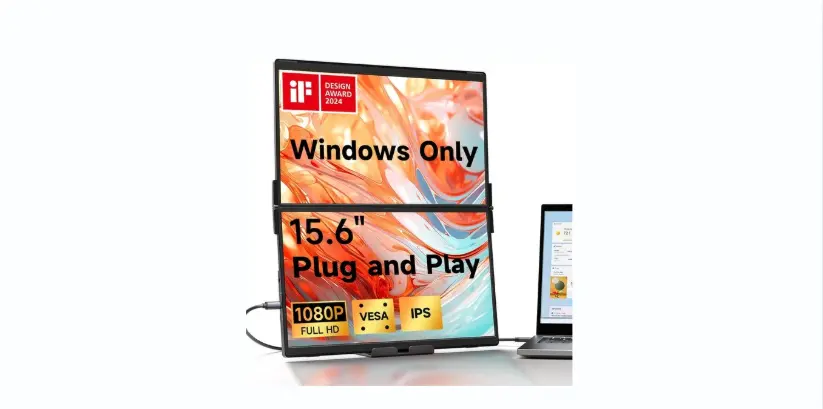
We’d been juggling windows like street performers, and honestly, not doing it particularly well. Too many meetings, too many apps, too little screen. The promise of a compact, foldable, vertical setup that adds two 15.6-inch monitors to our laptop—without turning our bag into a kettlebell—was irresistible. The “Laptop Screen Extender 15.6” – Dual Portable Monitors 1080P IPS FHD Stacked Folding Triple Display HDMI USB-C Travel Extended Extra Screen for Laptop Windows Mac w/Stand & VESA – LCD Panels” sounded like the Swiss Army knife of portable displays, only less likely to get confiscated at airport security.
We wanted something that could travel with us, stack vertically to save desk width, connect easily, and not make our laptop fan sound like a vintage hair dryer. This setup promised all of that plus the ability to rotate, fold, and mount—like yoga, but for screens.

What’s in the Box (and How It Feels to Unbox)
We opened the package with the reverence of someone who has sworn off clutter but keeps acquiring things with hinges. Inside, we found:
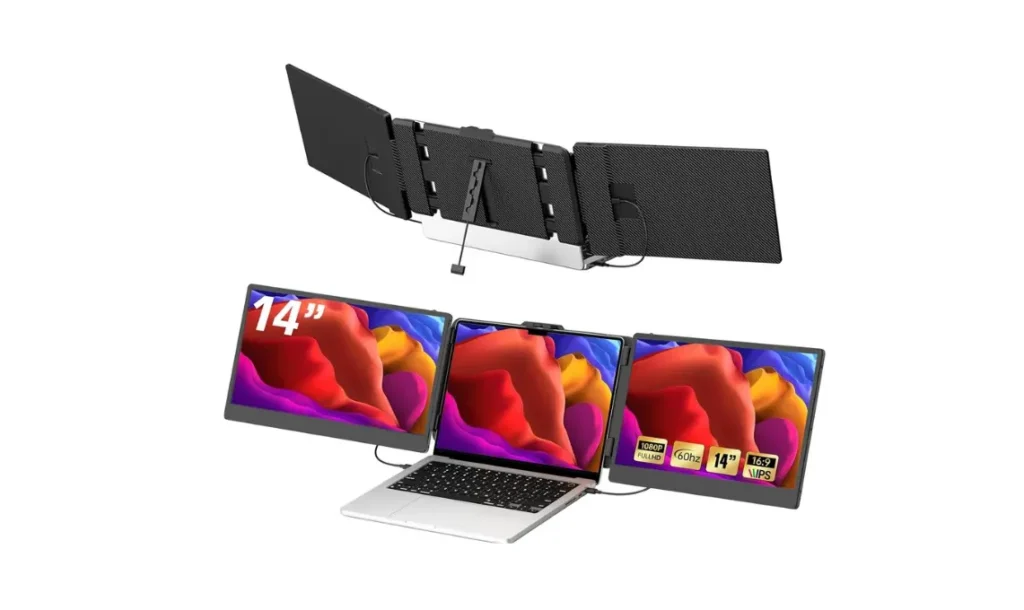
- Two 15.6-inch IPS LCD panels attached in a stacked, folding structure
- A sturdy, adjustable stand
- A well-made travel bag that feels more “executive weekender” than “pillowcase with a zipper”
- Cables for USB-C, HDMI, and USB-A power options
- A power adapter that we learned to appreciate more than coffee
- Documentation that’s short enough to read, but thorough enough to save us from guessing
The hardware feels solid. The metal frame gives it a premium vibe and practical protection when folded—like a portable vault for pixels. It’s reassuring if, like us, we’re the type who accidentally bumps their bag into doorframes and then pretends it was a test.
Core Specs at a Glance
We love a spec sheet that doesn’t require a decoder ring. Here’s the short version of the important bits:
| Feature | Details |
|---|---|
| Screen Size | Dual 15.6-inch IPS LCD panels |
| Resolution | 1920 x 1080 (FHD) per panel |
| Refresh Rate | 60 Hz |
| Color | 94% sRGB |
| Contrast Ratio | 1200:1 |
| Aspect Ratio | 16:9 |
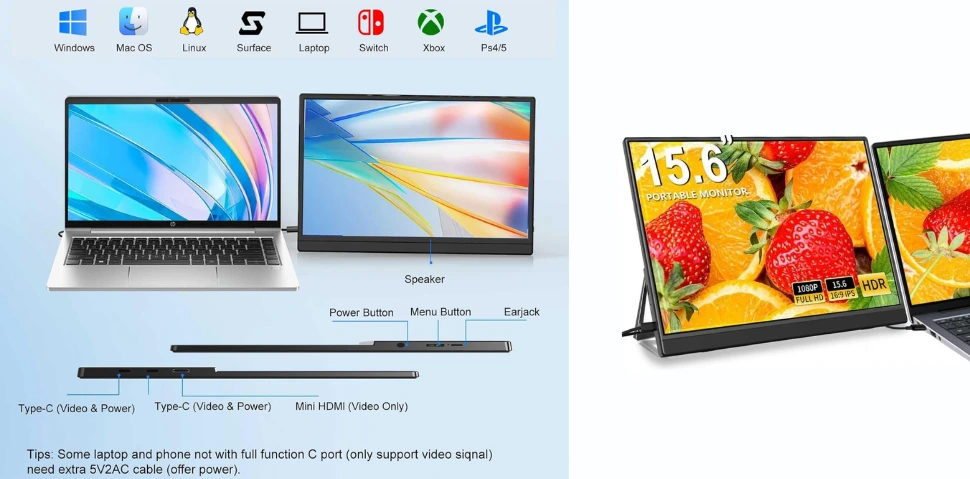
| Ports | 2x full-featured USB-C, 1x HDMI |
| Eye Comfort | Anti-glare, flicker-free features |
| Modes | Extend, Mirror, Splicing; Portrait/Landscape; Upper-screen flip |
| Rotation | 0–315° |
| Stand | 120° adjustable stand |
| Mounting | Four VESA holes |
| Compatibility | Windows, macOS, phones with DP Alt Mode, PS5/PS4, Xbox, Switch |
| Power | Use the included power adapter for best results |
It’s enough to reassure us that we’re getting real displays, not novelty screens pretending to be helpful. The 94% sRGB coverage is respectable for productivity and casual creative work, and the 60 Hz refresh rate is plenty for spreadsheets and streaming, with light gaming on the side.
Setup: Plug, Play, and Pretend We Always Work This Efficiently
The hallmark of portable gear should be simplicity, and this system does well there. It’s pretty forgiving, and it comes with all the cables we actually need instead of the ones we only keep because they might become useful when the moon is in retrograde.
The Golden Rule: Power First
Before anything else, we plug in the included power adapter to the monitor system. Yes, some hosts can power devices over USB-C, but powering two 1080p panels reliably is a different story. When we tried skipping this, we ended up in a game of connect-and-pray. With the power adapter, everything sprang to life and stayed there.
For USB-C Laptops (Thunderbolt 3 or USB-C with DisplayPort Alt Mode)
If our laptop supports Thunderbolt 3 (or newer) or USB-C with DP Alt Mode, setup is pleasantly straightforward:
- Plug the power adapter into the monitor system.
- Connect a full-featured USB-C cable from our laptop to the monitor’s USB-C input.
- In our OS display settings, arrange the screens vertically if we want the spliced “tall page” effect.
Depending on our device, a single USB-C connection may drive both screens, or we may use an additional cable (USB-C or HDMI) for the second panel. The kit includes what we need for either path.
For HDMI-Only Systems
If our laptop or desktop doesn’t have a USB-C port that supports video, we can do this:
- Plug in the monitor’s power adapter.
- Connect HDMI (from our host) to the monitor’s HDMI input for video.
- Use a USB-A cable (from our host) for data and/or power as needed.
- Configure display settings as usual.
This setup is common with older laptops and most desktop PCs.
For macOS Users
macOS can be delightful, but when it comes to multiple external displays, some models are more accommodating than others:
- MacBooks with M1 (base) and M2 (base) typically support only one external display natively.
- MacBooks with M1 Pro/Max, M2 Pro/Max, and M3 families support multiple external displays.
- We can still use both screens with certain third-party DisplayLink adapters/software, but that’s beyond the scope of what’s included.
If we’re unsure, we check our Mac model’s specs for external display support before purchasing.
Phones, Consoles, and Other Curiosities
- Phones that support DisplayPort Alt Mode (some Android phones) can work via USB-C for mirrored or extended scenarios, depending on the device.
- Game consoles like PS5/PS4, Xbox, and Switch work via HDMI. Remember, most consoles mirror output; we won’t get two different displays from a single console signal. Still, the stacked layout is neat for keeping the game on one panel and a guide or chat on the other via a second input source (like a laptop).
Quick OS Tips
- In Windows, we open Display Settings and choose Extend (not Duplicate) to get separate panels. Drag the screen diagrams to match the stacked layout.
- In macOS, we go to System Settings > Displays > Arrange to stack them vertically.
- If we want the “splicing” experience—one long window across both panels—we make sure the OS arrangement puts one directly above the other.
Once configured, our laptop, plus these displays, becomes a vertical command center. We felt instantly more competent, which is a rare feeling we recommend chasing.
Design and Build: Folding Screens That Don’t Feel Fragile
We’re picky about hinges. The hinges here are firm, smooth, and allow for meaningful configurations without that loosey-goosey feeling that makes us paranoid. The entire unit folds into a compact slab, and the metal chassis offers reassuring protection. When folded, it doesn’t feel like a delicate gadget; it feels like a well-made tool.
The stand adjusts up to 120°, letting us set the screens at a comfortable angle. The frames rotate up to 315°, which sounds like gymnastics but translates into practical positioning options. The included bag is sturdy and nicely padded, and it holds the whole kit with room for cables.
We also appreciate the four VESA mounting holes. If we want to set this up on a monitor arm or a desk mount, we can. It’s rare to see a portable screen that plays nicely with both travel and a more permanent workstation.
Screen Quality: FHD that Actually Feels Crisp
We’re not pixel snobs, but we are text snobs. The 1080p resolution at 15.6 inches is a sweet spot for clarity without demanding too much graphics horsepower. With IPS panels, off-axis viewing is solid, color shifts are minimal, and the anti-glare coating does a good job of cutting reflections.
- Color: At 94% sRGB, the screens are more than capable for general productivity, light photo editing, and video work that isn’t color-critical.
- Contrast: The 1200:1 ratio gives sufficient depth for web content, spreadsheets, and streaming. Blacks aren’t OLED-deep, but they won’t look washed out in normal office lighting.
- Refresh rate: 60 Hz is standard and smooth enough for typing, scrolling, and casual games. We didn’t feel like we were dragging windows through molasses.
These panels are about comfort and clarity. For most knowledge work, they hit a very nice balance.
Ergonomics: The Joy of a Vertical Stack
We love the vertical layout for one simple reason: it reduces side-to-side neck swivel. Having two screens stacked means our eyes track up and down, which is surprisingly comfortable. Long documents, code, and even research papers benefit from a taller canvas.
- Split-screen mode leaves one panel for content and the other for tools.
- The upper screen flip support is a small but smart touch when we’re using different orientations.
- Anti-glare and flicker-free features add to comfort; combined with sane brightness levels and breaks, this setup feels kinder on the eyes than a tiny laptop display.
We wouldn’t call it a cure for fatigue—standing desks and good posture still matter—but as a daily companion, this configuration felt like an ergonomic upgrade.

Display Modes That Actually Help Us Work
The system supports Extension, Mirroring, and Splicing. Here’s how each mode fits into our day:
- Extend: Our favorite. We keep reference material on one panel, our main work on the other. Video call up top, notes and chat below. Or browser up top, spreadsheet below. It’s multitasking without the alt-tab regret.
- Mirror: Handy for sharing with someone across the table. Put slides or a demo up top, keep our notes hidden below. Or vice versa. It helps us look prepared, which we only occasionally are.
- Splicing: The fancy term for arranging the displays so our OS treats them as adjacent vertical monitors, creating one tall working area. Perfect for coding, financial models, and long-form writing.
Also notable: portrait and landscape flexibility. For reading, a portrait arrangement makes pages look more natural. For photo browsing or typical productivity, landscape wins.
Real-World Workflows We Actually Used
We put the system to work across a week of hybrid chaos—home, office, coffee shops, and a flight where we swore to keep our elbows to ourselves.
- Video conferencing: Meeting on top, agenda and notes on bottom. We didn’t have to tab away to check a link someone dropped in chat.
- Research and writing: PDFs and web articles on the upper screen, writing app on the lower. No more partial windows and frantic scrolling.
- Coding and logs: Code editor below, terminal or documentation above. Debugging was calmer—or at least better organized.
- Data wrangling: Spreadsheet below, charts or analytics dashboard above. We could keep our formulas visible and still see the summary.
- Traveling light: The bag handles everything. We pulled it out and set it up in minutes at a small café table, where we pretended not to hear the espresso machine hiss like it had personal issues.
Gaming and Streaming: Yes, It’s Fun Too
We didn’t buy this for gaming—but we still tried it. The 60 Hz refresh rate and IPS panel handle casual titles nicely. With consoles via HDMI, we mirrored content, which is what most consoles do anyway. The stacked layout let us keep a guide or group chat open on the second panel from a laptop—oddly satisfying and a boon for co-op strategy.
For streaming and movies, we appreciated the anti-glare finish and predictable color. It’s not a cinema display, but it’s comfortable, crisp, and better than a single laptop screen for sharing a watch session.
Portability: Thoughtfully Compact, Surprisingly Tough
Folded, the unit feels secure thanks to the metal frame. The hinges don’t rattle. The included bag has just enough padding and structure to prevent the dreaded “corner dent.” We tossed it in a backpack without babying it and it emerged unscathed.
Will it fit on an airplane tray table? That depends on the airline and our luck. On most desks and coffee shop tables, it was perfectly manageable, especially since the vertical stack uses height, not width. If desk space is narrow but we’ve got a bit of headroom, this design makes a lot of sense.
VESA Mounting and Permanent Desks
The four VESA holes are a quiet superpower. When we’re not traveling, we can drop the system onto a compatible desk mount or arm and enjoy a stable, semi-permanent rig. It’s nice not to buy separate monitors just for the home office. We just pop it off the mount and fold it into the travel bag when we’re headed out the door.
We recommend checking our VESA mount’s size and screws to match what the unit accepts. The documentation details the pattern, and our general rule is to use the included hardware when possible.
Power and Heat: Keep It Plugged and Calm
We learned quickly that powering two displays from a laptop’s USB-C port is a great way to trigger battery anxiety. Using the included power adapter tames everything—stable brightness, consistent image, fewer cable gremlins. The panels get mildly warm during use, but never alarmingly so.
For long sessions, we keep brightness at a reasonable level to reduce power draw. Our laptop fans behaved normally, with no sudden jet-engine incidents. That said, running three displays (laptop plus two externals) will nudge our system’s GPU to work a little harder. It’s the price of productivity, and honestly, a fair trade.
Compatibility Cheat Sheet
Because nothing ruins momentum like the wrong cable:
| Device Type | Best Connection | Notes |
|---|---|---|
| Windows laptop with Thunderbolt 3/USB-C DP Alt Mode | USB-C to monitor + power adapter | Easiest setup. Arrange vertically in Display Settings. |
| Windows laptop HDMI-only | HDMI for video + USB-A for power/data + power adapter | Works fine; a few more cables. |
| MacBook with M1/M2 (base) | One external display natively | Second display may require DisplayLink; not included. |
| MacBook with M1 Pro/Max, M2 Pro/Max, M3 | USB-C or HDMI + power adapter | Supports multiple displays. |
| Desktop PC | HDMI or DisplayPort (via adapter) + power adapter | Straightforward; depends on available ports. |
| Android phone with DP Alt Mode | USB-C + power adapter | Often mirrors; varies by device and OS. |
| PS5/PS4, Xbox, Switch | HDMI + power adapter | Typically mirror mode; still useful for multi-source setups. |
If our device supports Thunderbolt 3.0 or USB 3.1 Type-C DP Alt Mode, we’ll get the smoothest, neatest setup. Otherwise, HDMI to Mini HDMI—plus the included power—does the job.

Features That Stood Out
- Stacked dual 15.6-inch IPS panels that fold into a single portable unit
- Anti-glare and flicker-free features that reduce visual fuss
- 0–315° rotation and 120° stand adjustability for ergonomic positioning
- VESA mounting that works for a home desk setup
- Includes all the cables we’re likely to need, plus a quality bag
- Multiple display modes that are actually useful, not just spec filler
We felt like we got the best of “portable” with just enough “pro” to make it part of our daily workflow.
Where It Shines (and Where It Doesn’t)
Let’s be honest about strengths and trade-offs.
Pros
- Truly increases usable screen real estate without hogging desk width
- Easy setup, especially with USB-C DP Alt Mode
- Solid build with a metal frame; folds safely for travel
- Good color and contrast for productivity and casual creative work
- Clever ergonomics and flexible modes
- The included power adapter eliminates most reliability issues
- VESA mountable—rare for a portable stack
Cons
- On some Macs (base M1/M2), dual external displays require third-party solutions
- 60 Hz is not for competitive gaming or high-frame-rate fanatics
- FHD is great for most tasks, but not for high-end photo/video color work
- Requires the included power adapter for best stability, adding one more brick to our bag
- Splicing across two screens still depends on OS display arrangement; there’s no magic “one canvas” button
Is it perfect? No. Is it thoughtful and well-suited to today’s mobile knowledge worker? Absolutely.
The Workday We Didn’t Know We Needed
We expected more pixels. We didn’t expect the vertical stack to change how we plan our day. Suddenly:
- We keep our meeting on the top panel and our notes below, avoiding awkward pauses while we fumble for the right window.
- Writing feels calmer with research above and drafts below.
- We make fewer mistakes in spreadsheets when we can keep formulas and feeders visible without chopping windows.
Does it make us 300% more efficient, as the marketing suggests? That’s hard to quantify. But it does make us feel more in control—and less likely to snap at our browser for hiding the tab we needed two seconds ago.
How It Compares to Alternatives
We’ve tried side-mounted, clip-on laptop extenders that turn our laptop into a winged creature. Those are clever for width, but not great on cramped desks and often feel precarious. We’ve also tried lugging two separate portable monitors, which felt like packing for a weekend wedding where we bring our own centerpieces.
This stacked, foldable design strikes a better balance:
- More compact footprint than dual side-by-side panels
- More stable than clip-on extenders that hang from our laptop lid
- Faster to deploy than two independent screens with separate stands
If we rarely travel and have the desk space, traditional desktop monitors are still the king. But for hybrid work, cafés, client sites, or shared spaces, this system is the best compromise we’ve used.
Longevity and Care
We treat it like a good umbrella: it does its job quietly, but we still respect the hinges.
- Use the included bag for transport; it’s protective without bulk.
- Avoid putting it at the bottom of a bag under a library’s worth of hardbacks.
- Clean with a microfiber cloth. We skip harsh sprays and abrasive cloths.
- Use the power adapter. We know we’ve said it before, but it prevents intermittent nonsense.
We expect the metal frame and hinge design to hold up well with normal use. Like all portable hardware, gentle handling buys us years.
Quick Tips and Troubleshooting
If a panel doesn’t show up immediately:
- Confirm the monitor power adapter is connected and the indicator lights are on.
- If using USB-C, ensure it’s a full-featured cable and port (DP Alt Mode/Thunderbolt).
- If using HDMI, connect USB-A for power and data as directed.
- Update GPU drivers (Windows) or check macOS updates.
- Try one panel at a time to isolate the issue.
- Check OS display settings; sometimes the OS detects the screen but places it “off canvas.”
- Reset display arrangement and reconfigure stacking.
If color looks off:
- Set both panels to the same color profile within the OSD (if available) and in OS settings.
- Keep brightness levels consistent across the two panels.
If the laptop battery drains fast:
- Always use the included monitor power adapter.
- Reduce screen brightness a bit.
- Close any background apps that pretend to be helpful.
A Week on the Road With It
We packed the unit for a short trip and put it through the traveling-worker gauntlet: hotel desk, coworking space, client office, and a café where the chairs were too charming to be comfortable.
- Setup time: around 2–3 minutes from “unzipping bag” to “ready to work.”
- Cable management: painless when we packed the cables in a small pouch inside the included bag.
- Stability: the stand held well on every surface we tried. On wobbly café tables, we kept the angle shallow, which helped.
- Looks: clients noticed. We weren’t trying to show off, but it did make us look prepared in a way that “shuffling tabs” never does.
For Whom This Is Great (and Not So Great)
Great for:
- Remote/hybrid workers who want a serious mobile workstation
- Writers, researchers, and developers who benefit from vertical real estate
- Analysts and project managers juggling dashboards, decks, and docs
- Students in online classes who need to keep lectures and notes visible at the same time
- Travelers who want a sturdy, foldable solution that doesn’t sprawl across the table
Not ideal for:
- Color-critical creative professionals who demand wide-gamut panels and hardware calibration
- Competitive gamers chasing the highest refresh rates
- Anyone who refuses to carry a power adapter (we admire the idealism)
What Surprised Us
We expected screens. We didn’t expect the vertical stack to change how we write and present. We found the “mirror to share, extend to work” rhythm unexpectedly natural. We also liked that the unit felt closer to a single object than a pair of fragile displays taped together. There’s an internal coherence to the design that makes it a pleasure to use daily.
Value and Longevity
As a travel-friendly productivity upgrade, this system earns its keep. With build quality that inspires confidence and a feature set that feels complete rather than cobbled together, it’s more than a novelty. It’s a practical companion that bridges our home desk and our mobile life.
Will desktop monitors always offer more screen per dollar? Yes. But this isn’t about winning the “pixels per penny” contest. It’s about having a real workstation wherever we open our laptop—without turning our bag into a workout.
A Few Practical Use Cases We Keep Returning To
- Weekly reports: dashboards above, notes and email below.
- Coding sprints: editor below, API docs and issue tracker above.
- Interviewing candidates: video call on top, questions and resume below.
- Studying: lecture stream on top, textbook PDF or flashcards below.
- Travel day admin: itinerary and maps above, tasks and messages below.
- Light design work: canvas below, layers and palettes above.
These are the moments when the unit makes us feel like we’re working with our computer instead of fighting it.
Frequently Asked Questions
Q: Can we run both displays with one USB-C cable? A: It depends on the laptop. Many Thunderbolt/DP Alt Mode ports can handle dual outputs via MST on Windows. Mac support varies by model. For the most reliable experience, connect the included power adapter and use USB-C and/or HDMI as needed per the manual.
Q: Does it work with macOS? A: Yes, but note that base M1 and M2 MacBooks typically support only one external display natively. M1 Pro/Max, M2 Pro/Max, and M3 models support multiple externals. Third-party DisplayLink solutions can extend support but aren’t part of the package.
Q: Can we mount it with VESA? A: Yes, there are four VESA holes for mounting on compatible arms or stands. Check the documentation for exact pattern and screw specifications.
Q: Is 1080p on 15.6 inches sharp enough? A: For productivity, yes. Text is crisp, apps look clean, and performance stays efficient. For high-end media creation, higher resolution and wider color gamut screens may be preferable.
Q: Will it help us “boost efficiency by 300%”? A: That’s a bold manufacturer claim. We can’t quantify a number, but we can say we felt notably more organized and faster, especially when working across documents, calls, and references.
Q: Can we use it for console gaming? A: Sure. Consoles connect via HDMI, usually in mirrored output. It’s a fun way to game while keeping a second source (like a laptop) active on the other screen for chat or guides.
Q: Is it heavy? A: It’s solid but not burdensome. While exact weight isn’t listed here, the foldable design and included bag make it manageable for daily carry.
Q: Do we need to worry about glare? A: The anti-glare finish helps a lot. It’s not magic in direct sunlight, but in typical indoor lighting, reflections were minimal.
The Verdict We’re Happy to Stand Behind
The “Laptop Screen Extender 15.6” – Dual Portable Monitors 1080P IPS FHD Stacked Folding Triple Display HDMI USB-C Travel Extended Extra Screen for Laptop Windows Mac w/Stand & VESA – LCD Panels” is a thoughtfully designed, sturdy, and genuinely helpful way to build a triple-display setup on the go. It transforms our laptop from a single-pane porthole into a functional workstation without demanding a permanent desk or a second mortgage.
We appreciate the clear 1080p IPS panels, flexible rotation, and the smart inclusion of VESA mounting and a quality bag. The stacked layout is the star: it makes a small footprint feel big, keeps our neck happy, and helps us hold focus. If we live between home, office, and “whatever table is available,” this system keeps us productive—and even a little proud of our setup.
We’ll keep using it—and we’ll keep carrying the power adapter, because we’ve learned our lesson.
Disclosure: As an Amazon Associate, I earn from qualifying purchases.