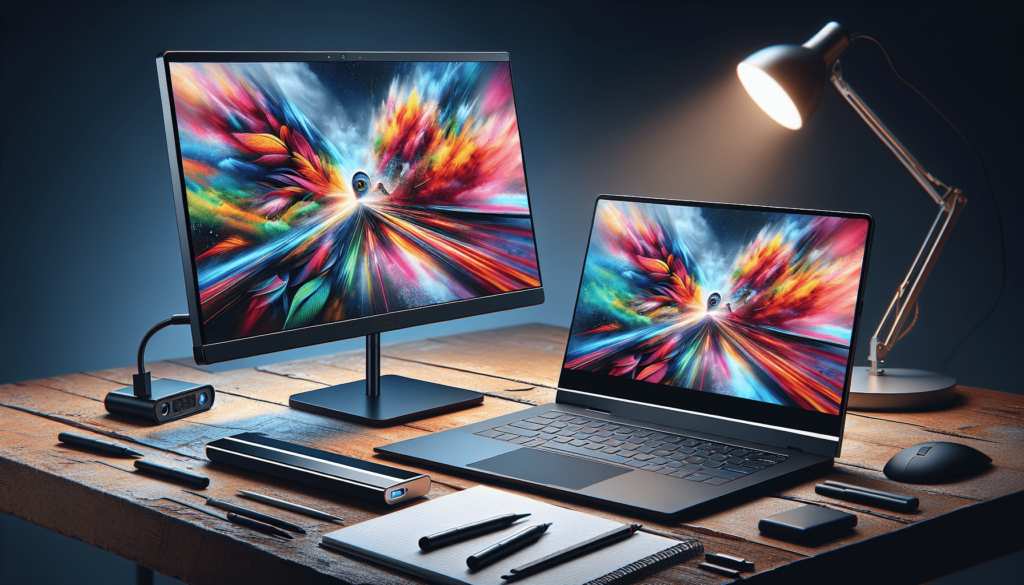
Have you ever wondered if you can extend a display with a USB-C connection? If so, you’re in the right place! I’m here to help you navigate the somewhat confusing world of USB-C and display extension. Picture this: you’re working with multiple spreadsheets, editing videos, or maybe just itching for some Netflix action while scrolling through emails. Adding an extra display could be a game-changer.
USB-C has become one of the most common ports on modern laptops, tablets, and even some smartphones. But can it really handle the strains of extending to an additional display? In this article, we’ll break down the intricacies of USB-C, its capabilities, and how you can use it to create a multi-display setup. Whether you’re tech-savvy or a complete novice, I hope to make things crystal clear for you by the end of our discussion.
What Is USB-C?
USB-C, short for Universal Serial Bus Type-C, is a standard for connecting and powering devices. It’s an evolving technology that has numerous benefits over its predecessors, namely its reversible design and universal applicability. Gone are the days of fumbling to plug your cable in the right way!
Reversible Design and Enhanced Capabilities
One of the standout features of USB-C is its reversible design. Unlike the older USB-A, which only fits one way, USB-C can be plugged in either direction. But more importantly, it supports a range of functions including power delivery, data transfer, and video output. The port itself is small and oval-shaped, making it a versatile solution for modern devices.
| Feature | USB-C | Previous USB Versions |
|---|---|---|
| Reversible Design | Yes | No |
| Power Delivery | Up to 100W | Up to 5W |
| Data Transfer Speed | Up to 40 Gbps (USB4) | Up to 5 Gbps (USB 3.0) |
| Video Output | Yes (with Alt Mode) | No |
Alt Mode: The Secret Sauce for Video Output
One aspect of USB-C that often goes unnoticed is its Alternate Mode (Alt Mode). Alt Mode allows the USB-C port to transmit video signals, essentially doubling as an HDMI or DisplayPort connection. Not all USB-C ports support Alt Mode, so it’s crucial to check if your device is compatible.
If you’re wondering how to verify if your USB-C port supports Alt Mode, here are a few methods:
- Manual Check: Refer to the manufacturer’s specifications or user manual.
- Symbol Check: Look for a tiny symbol (often a lightning bolt or a “DP” logo) next to the port.
- Device Manager: On a Windows PC, go to Device Manager and check under Display Adapters.
Types of USB-C Cables
Not all USB-C cables are created equal. When it comes to extending a display, the type of USB-C cable you’re using can make or break your setup. Let’s explore the various types so you can make an informed choice.
Cable Types
The following table outlines the different types of USB-C cables and their supported features:
| Cable Type | Data Transfer Speed | Power Delivery | Alt Mode (Video Output) |
|---|---|---|---|
| USB 2.0 | Up to 480 Mbps | No | No |
| USB 3.1 Gen 1 | Up to 5 Gbps | Yes | Yes |
| USB 3.1 Gen 2 | Up to 10 Gbps | Yes | Yes |
| Thunderbolt 3 | Up to 40 Gbps | Yes | Yes |
| USB4 | Up to 40 Gbps | Yes | Yes |
Choosing the Right Cable
When choosing a USB-C cable for display extension, you’ll want to pay attention to both the data transfer speed and the capability to support Alt Mode. Ideally, opt for a Thunderbolt 3 or USB4 cable for the best performance. These cables not only offer the fastest data transfer rates but also ensure robust power delivery and video output capabilities.
Methods to Extend a Display Using USB-C
There are several methods to extend your display using a USB-C connection, each with its own set of requirements and advantages. Let’s go through the most common methods.
Direct USB-C to HDMI/DisplayPort Cable
One of the simplest ways to extend a display is by using a USB-C to HDMI or DisplayPort cable. This method doesn’t require any adapters or docks, making it straightforward and easy to set up.
Steps to Set Up:
- Check Compatibility: Ensure that your USB-C port supports Alt Mode.
- Purchase the Right Cable: Opt for a high-quality USB-C to HDMI/DisplayPort cable.
- Connect: Plug one end of the cable into your device and the other end into your external monitor.
- Configure: Adjust display settings on your device to extend the screen.
USB-C Docking Stations
For those looking for a more robust solution, a USB-C docking station might be the way to go. These devices often come with multiple ports, allowing you to connect not just an external monitor but also peripherals like keyboards and mice.
Steps to Set Up:
- Choose a Docking Station: Look for a docking station that supports video output, preferably with multiple ports.
- Connect Docking Station: Plug the docking station into your USB-C port.
- Connect External Devices: Use HDMI or DisplayPort cables to connect monitors to the docking station.
- Power On: Turn on your monitors and configure display settings on your device.
USB-C Adapters
USB-C adapters are another convenient option for extending your display, especially if you already have HDMI or DisplayPort cables lying around.
Steps to Set Up:
- Select an Adapter: Choose a reliable USB-C to HDMI or DisplayPort adapter.
- Connect Adapter: Plug the adapter into your USB-C port.
- Attach HDMI/DisplayPort Cable: Connect the cable from the adapter to your external monitor.
- Adjust Settings: Navigate to your device’s display settings to extend the screen.
Factors to Consider
Even with the right cable or adapter, a few additional factors can impact your ability to extend a display with USB-C. Let’s delve into some of these considerations to ensure a smooth experience.
Device Compatibility
Not every device is created with the same hardware capabilities. It’s essential to check if your device can handle extended displays over USB-C. Operating systems also play a role in compatibility, so make sure your OS supports multi-display setups.
Resolution and Refresh Rate
Different cables and adapters support different maximum resolutions and refresh rates. When extending a display, ensure your chosen method can support the desired resolution and refresh rate. Here’s a handy table for quick reference:
| Cable/Adapter Type | Maximum Resolution | Maximum Refresh Rate |
|---|---|---|
| USB 3.1 Gen 1 | 4K | 30Hz |
| USB 3.1 Gen 2 | 4K | 60Hz |
| Thunderbolt 3 | 5K | 60Hz |
| USB4 | Up to 8K | 60Hz |
Power Requirements
While many USB-C ports support power delivery, extending a display might significantly increase power consumption. Ensure that both your USB-C port and the connected monitor can handle the required power. In some cases, you might need an external power source for the docking station or the monitor itself.
GPU Capabilities
Your device’s GPU (Graphics Processing Unit) plays an essential role in handling additional displays. High-end GPUs can easily manage multiple displays, but older or integrated GPUs might struggle, leading to lag or subpar performance. Before setting up an extended display, check your GPU’s specifications and capabilities.
Troubleshooting Common Issues
Even with the right setup, you might encounter some hurdles along the way. Here are common problems you might face and their solutions.
No Signal Detected
Sometimes, your monitor might not detect any signal from your device. Here’s what you can do:
- Check Cables: Ensure that all connections are secure and that the cables are functional.
- Verify Alt Mode: Confirm that your USB-C port supports Alt Mode.
- Update Drivers: Make sure your device’s drivers are up to date.
- Restart Devices: Restart both your computer and the external monitor.
Resolution Issues
If your external display’s resolution looks off, follow these steps:
- Adjust Settings: Go to your device’s display settings and manually adjust the resolution.
- Update GPU Drivers: Ensure that your GPU drivers support the desired resolution.
- Change Cables: Sometimes, using a higher-quality cable can fix resolution issues.
Flickering Screen
A flickering screen can be incredibly frustrating. Here’s how to address it:
- Check Refresh Rate: Ensure the refresh rate is compatible with your monitor.
- Use Shorter Cables: Longer cables can sometimes lead to signal degradation.
- Power Supply: Make sure all devices are adequately powered and not experiencing interference.
Practical Scenarios and How to Address Them
Depending on your specific needs, your setup might vary. Here are some practical scenarios and how you can extend your display using USB-C.
For Professionals
If your job involves handling multiple applications or large datasets, extending your display can considerably enhance productivity.
Ideal Setup:
- Device: Laptop with Thunderbolt 3 support
- Cable: Thunderbolt 3 or USB4
- Accessories: USB-C docking station with multiple HDMI/DisplayPort outputs
- Steps:
- Connect the docking station to your laptop
- Attach multiple monitors to the docking station
- Adjust settings on your laptop to extend the display
For Gamers
Gamers often seek high-resolution and high-refresh-rate displays for an immersive experience.
Ideal Setup:
- Device: Gaming laptop or desktop with high-end GPU
- Cable: USB4 or Thunderbolt 3
- Accessories: USB-C to DisplayPort adapter
- Steps:
- Connect the adapter to your USB-C port
- Attach to a high-refresh-rate monitor
- Adjust settings to match the monitor’s capabilities
For Home Office Users
A simple yet effective setup can make working from home more pleasant.
Ideal Setup:
- Device: Modern laptop with USB-C Alt Mode support
- Cable: USB-C to HDMI
- Steps:
- Connect the USB-C to HDMI cable
- Attach the HDMI end to an affordable external monitor
- Adjust settings to extend or mirror the display
Future of USB-C and Display Extension
USB-C is continuously evolving, with the latest iteration being USB4. The future looks promising, making it easier than ever to extend displays with enhanced capabilities and fewer limitations.
USB4 Advancements
USB4 brings several improvements over USB 3.1 and Thunderbolt 3. It offers higher data transfer rates, better power delivery, and improved video output capabilities. As more devices adopt USB4, the process of extending displays will become increasingly seamless.
Wider Adoption
With major tech companies moving towards a USB-C standard, it’s only a matter of time before it becomes universal. This means more devices will support video output through USB-C, reducing compatibility issues and making it easier for everyone to extend their displays.
Enhanced Performance
As hardware continues to advance, we can expect better GPU support and higher resolutions, offering an even smoother experience for those looking to extend their displays. This includes support for 8K displays and even multiple high-resolution monitors simultaneously.
Conclusion
In a world where efficiency and productivity are paramount, extending your display can be incredibly beneficial. Whether you’re a professional juggling multiple tasks, a gamer seeking an immersive experience, or a home office user looking for a little more screen real estate, USB-C can be the key to unlocking a more efficient workspace.
To sum it up:
- Check Compatibility: Ensure your device and USB-C port support Alt Mode.
- Choose the Right Cable: Opt for cables that offer high data transfer rates and support power delivery.
- Consider a Docking Station or Adapter: These can add functionality and convenience.
- Address Potential Issues: Be aware of factors like resolution, refresh rate, and power requirements.
With the right setup and a little bit of know-how, you can harness the full power of USB-C to extend your display and create a more productive and enjoyable environment.


